
Are you looking to learn how to test and tag with a multimeter? Well, you’re in the right place! Testing and tagging is essential for ensuring electrical equipment’s safety and compliance. By regularly testing and tagging your equipment, you can identify any faults or potential hazards and take the necessary steps to prevent accidents or damage.
A multimeter is a versatile tool that can measure voltage, current, and resistance, making it perfect for electrical inspection. In the following sections, we will guide you on using a multimeter to test and tag your equipment so you can have peace of mind knowing that your electrical systems are safe and in good working condition.
So, let’s dive in and learn how to test and tag with a multimeter!
Understanding the Basics of Testing and Tagging
Before diving into the intricacies of testing and tagging, let’s first grasp the fundamental principles that lay the groundwork for this electrical adventure.
It’s essential to understand the basics when it comes to testing and tagging with a multimeter. A multimeter is a versatile tool for measuring voltage, current, and resistance in electrical circuits. Using the different functions of a multimeter, you can troubleshoot electrical issues, check the continuity of wires, and ensure the safety of electrical equipment.
To begin testing, you must set your multimeter to the appropriate function, such as voltage or resistance. This ensures that you’re measuring the correct parameter for your testing needs.
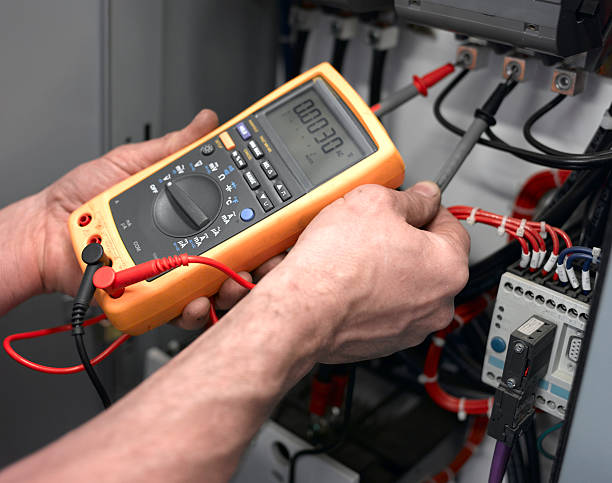
Next, connect the multimeter leads to the circuit or device you want to test. The red lead is typically used for positive connections, while the black lead is used for negative connections.
Once the leads are securely connected, you can turn on the multimeter and observe the readings. You can see the voltage, current, or resistance values displayed on the multimeter’s screen depending on the parameter you’re measuring. Understanding these basic steps will provide a solid foundation for your testing and tagging endeavors with a multimeter.
Using a Multimeter for Electrical Inspections
To properly inspect your electrical connections, you’ll want to rely on the trusty tool that reveals the hidden secrets of your circuits. That tool is a multimeter.
A multimeter is a versatile device that combines several functions into one. It can measure voltage, current, and resistance, making it an essential tool for electrical inspections.
Set the dial to the appropriate function to use a multimeter for electrical inspections. For example, if you want to measure voltage, set it to the voltage setting. Next, make sure the multimeter leads are connected correctly. The red lead should be connected to the positive terminal, and the black lead to the negative terminal.
Once everything is set up, you can start testing your electrical connections. Touch the multimeter leads to the points you want to test. The multimeter will display the results on its digital screen. This allows you to quickly and accurately assess the condition of your electrical circuits.
Using a multimeter for electrical inspections is a straightforward process. It provides valuable information about your circuits’ voltage, current, and resistance. By following the proper procedure and interpreting the results correctly, you can ensure the safety and efficiency of your electrical connections. So, remember to keep your trusty multimeter handy for all your testing and tagging needs.